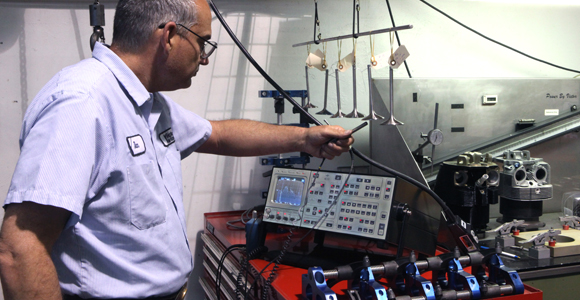
ACOUSTIC RESONANT PARTS INSPECTION
This is a Non Destructive Testing (NDT) Procedure that can detect resonant frequency shifts resulting from changes in mass, stiffness or damping of a part. Defects such as cracks, voids, chips, nodularity, porosity, variations in hardness, missed manufacturing processes, and delamination can be detected.
Acoustic Resonant Inspection works on the principle that every part has a unique vibration signature (resonant frequencies). These resonant frequencies will have little change from good part to good part. However they will shift when there is an internal or external change in the part from manufacturing variance or imperfection in the part.
 To determine a parts vibration signature, a striker will contact the part and a microphone will record the resonant frequencies generated on a full domain spectrum analyzer. These frequencies can then be compared to a known good part, and in sets of similar part numbers for matched sets. Should a part have a defect it will produce different frequencies. To determine a parts vibration signature, a striker will contact the part and a microphone will record the resonant frequencies generated on a full domain spectrum analyzer. These frequencies can then be compared to a known good part, and in sets of similar part numbers for matched sets. Should a part have a defect it will produce different frequencies.
For example, when a bell has a crack, it doesn’t have a clear ring, and loses its ability to hold its tone. The same is true of a part that has a flaw. It will then produce different frequencies.
For centuries Bell Manufacturers have been changing the shapes, materials, hardness and compositions of bells to attempt to produce a specific tone frequency.
 They would play a musical instrument such as a violin, to establish a specific tone or frequency and change the design of the bell to match the sound of the musical instrument. This same basic philosophy applies in Acoustic Resonant Testing because we can now determine changes in the shape, materials, hardness and composition of a part by causing the part to ring and evaluating the resonant frequencies. They would play a musical instrument such as a violin, to establish a specific tone or frequency and change the design of the bell to match the sound of the musical instrument. This same basic philosophy applies in Acoustic Resonant Testing because we can now determine changes in the shape, materials, hardness and composition of a part by causing the part to ring and evaluating the resonant frequencies.
The benefit of using this NDT procedure allows Victor Technicians to test the whole part for any imperfections instead of relying on just surface inspection techniques and matching parts for matched frequencies.
Back |